This was completely hand sewed with three different coloured fabric. It was a little too big for my head, but I'm sure it'll fit his perfectly.
Mushroom Chef Hat
My friend works at a restaurant as a Kitchen-hand/Chef Assistant. I made this for him as a thank you gift for the food he often cooked and brought for me. Like me, he was very fond of the mushrooms from Mario.
Bob Omb Tissue Dispenser
One thing that completely destroys the style of my bedroom...is a tacky toilet roll lying around.
So in my quest to cover it up, I created a cute Bob Omb plush so that it can comfortably sit on my bed and provide tissue when needed.
Tutorial
To create this, first make a big black ball. Sew the ball so that the top is left open. This opening will be used to put the toilet roll in and will be closed with a "metal cap" which will be made later.
Now you need to create the inner lining to fit the toilet roll in. I used stiff black felt so that my desired shape would retain when I filled the plush. Fill the plush, and then sew the inner lining to the black ball.
The eyes are simple white vinyl pieces sewed on. The yellow feet were sewed separately and then sewed onto the body.
The metal cap was sewed in a shape of a hollow tube for the toilet tissue to go through. Velcro was added to the sides so that the cap did not pull off when the toilet tissue was pulled from the plush.
Remember to remove the toilet roll tube from the centre of the toilet roll, and dispense the tissue from the centre when using this.
Cherry Blossom Lantern
With Christmas over, I had no use for my tree lights. I was also in need of a bedroom night light.
Tutorial
Gather four panels of cardboard and wrap in a thick white fabric. I used duct tape to stick the fabric on the cardboard, but you may choose to use other methods. As long as the fabric stays on the cardboard.
Cut out the branches on black felt and glue it on the four panels.
Connect the four panels so that the lantern is now box shaped and sitting upright. I stapled across the bottoms of each panel to connect them.
To create the cherry blossoms, cut out the patterns below in pink and white felt. Sew them together to shape into a cherry blossom.
Now position the cherry blossoms across the branches so that there is sufficient space from light bulb to bulb. The christmas lights will travel up one panel, down the next, up the next panel and down the last panel. Ensure to position the cherry blossoms so that the christmas tree lights can light each blossom.
Once the cherry blossoms are sewed on the panels, the christmas tree lights can then be placed from within the lantern. Holes will need to be pierced in each of the panels so that the bulb of the lights can go through. Secure each bulb on the panel using tape.
The top of the lantern is covered by a black "hat" sewed using black stiff felt. The bottom trim was made using a thin strip of black felt sewed across.
Toadstool
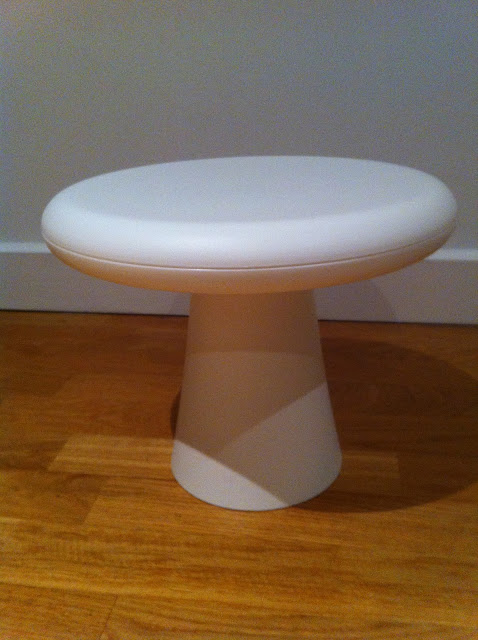
After several attempts of trying to teach my boyfriend that the coffee table is not a footstool, I finally decided to make a toadstool. With just hijacking a few IKEA items, and sewing a "toad shower cap", my glass coffee table is now foot print free.
Tutorial
You will need the following items from IKEA. A childrens stool (we are just using the top, so you may get rid of the legs) and a plastic vase.
Children Stool
Plastic vase
Connect the vase to the top circle. I used a glue gun. You should now have this.
Sew a circular pillow for cushioning. It will not be seen so you can use any scrap fabric you have.
Sew a big red shower cap. Embellish it with big white circles.
Fit the pillow on top of the stool, and cover it up with the red "shower cap". Sit down on your couch, and pop your footsies on it.
Note: This toadstool is designed for use as a footstool. If using it as a childrens stool, I will not be liable for any injuries.
Leaf pillow
From so many late all nighters from a uni life, my couch had become my second bed. I'ld wake up in the morning with a sore neck. Then, I would regret not using a pillow.
Having a dark brown couch, I thought this leaf pillow would set it off nicely.
Tutorial
Cut out a leaf shape on some green corduroy. Ensure the ribs are aligned diagonally to imitate the natural veins in a leaf. You will need two sets of these patterns.
Sew along the middle of the leaf, connecting the two patterns. Do this for the other set as well.
Now you just need to sew the two sets together, fill it with plush fillling and close up the stitches.
Laptop Case
Having a white macbook, I find that some form of case would be needed to shield my lovely baby from the harsh contents of my everyday bag when travelling.
Like with all newly attained gadgets, I became obsessive with accessorising and protecting it. I opted for a simple look to not only match the style of the macbook but so that I wouldn't be embarrassed bringing it to work in future.
The materials used were dark grey merino wool and creamy white vinyl for inner lining and the flower. Anyone who can cut and sew will be able to make one.
Bunny Slippers
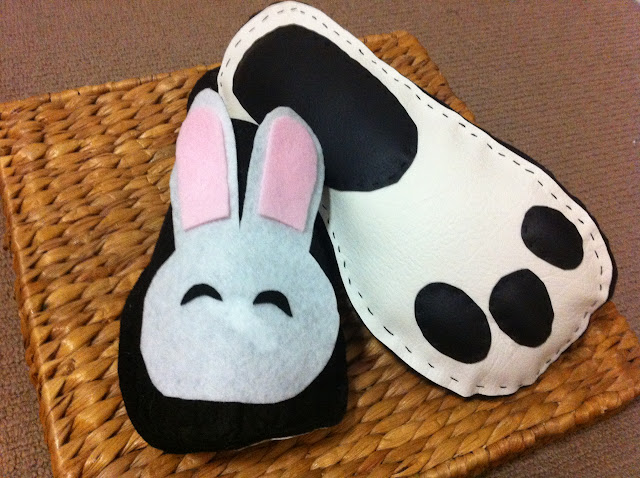
These were made for my boyfriend's christmas present. His current home slippers have hard plastic soles which slap noisily on the wooden floor boards everywhere he goes. These soft plush slippers are a lot more quieter. Unfortunately, his feet were too big.
So I'm going to give this to his mother instead. They were made of black stiff felt with white vinyl sewed on the bottom. The black paw print was sewed on the bottom of the base with black vinyl and was filled with cotton filling for comfortable cushioning of the feet when worn.
Slightly feminine for a male which was probably why my boyfriend was glad that his feet were too big.
Blog Archive
Labels
- Craft (7)


